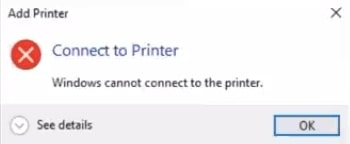
You will see the message “Windows cannot connect to the printer. Error: Operation failed with error 0x0000011B in-network” popping up on your screen. If you notice anything much, you will surely find a solution for the same. Here, we have got you covered with how you can fix the issue.
What Causes Operation Failed with Error 0x0000011b in Windows?
You generally notice the error if your printer is connected on a shared network in small offices, cyber cafes, schools, colleges, or at home when you have multiple devices. Their error occurs over printers on shared networks as the issue is spread on more than one computer.
Fix: Printer Driver is unavailable on Windows 10Printer Buying Guide: All You Need to KnowTop Tips For Streamlining Your Home Office Set-Up
The computer where you give the print command is the Client computer, whereas the computer where you install the printer is the Host Computer. After updating Windows, you may see the issue over your Client’s Computer. One of the reasons might be software bugs. Yes, this may sound weird, but many users have experienced it. After the recent Windows Update, some computers face an issue connecting with network printers. Often if you already have several printouts queued up on the network and you give a command via the Client Computer, then the Host Computer cannot process the request.
How to Fix Cannot Connect to the Printer Issue over Network Printers?
When the client’s computer cannot connect with the printer, it is due to the 00x0000011B error. You can follow the steps to debug the Windows that cannot connect to the printer error. But, make sure to follow the guidelines for both Host Computer and Client Computer:
Steps to Solve 00x0000011B Error over Client Computer
Before you move on to fix any issue, it is necessary to diagnose it well. For that, implement the steps mentioned below;
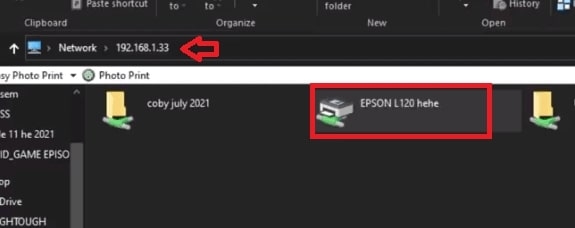
Open File Explorer and navigate to NetworkYou will see your Network Printer there. Double click your printer’s icon so it can connect with your printer.
But, if you see the Windows Cannot Connect to the Printer error message, it’s a 0x0000011B Windows error. Follow the given steps to fix the issue over the Host Computer.
Steps to Solve 00x0000011B Error over the Host Computer
Ensure that the steps below should be implemented for the Host Computer where you have installed your Network Printer.
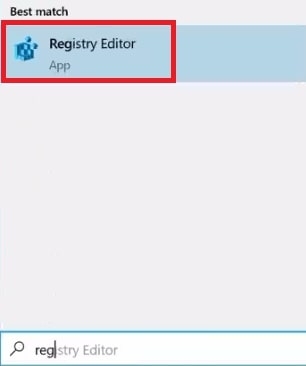
Press the Windows buttonNavigate to the Search bar and input “Registry Editor.”
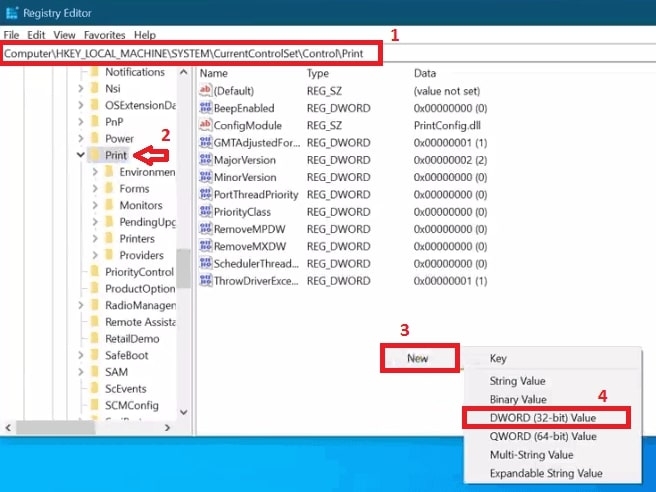
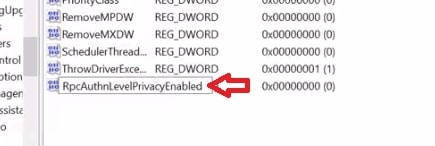
Now press the Enter key The Registry Window will openGo to the “Computer\HKEY_LOCAL_MACHINE\SYSTEM\CurrentControlSet\Control\Print” optionRight-click in the blank space of the window, and you will see a dropdown menuNavigate to “DWORD (32-bit) Value”, another menu will open, and press the “New” button.
To the DWORD value, now you rename it to “RpcAuthnLevelPrivacyEnabled.” Select the Enter key, and this will confirm your action.
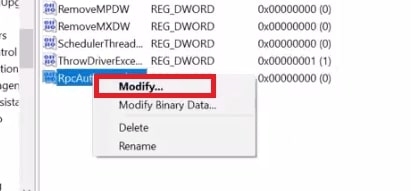
Now, when you see the renamed DWORD file in the list, right-click and choose the “Modify” option.
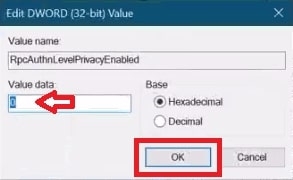
You will see the Editing Window for the sake, then set the Value to “0.”Press the “OK” option.Now, you can exit the Registry Editor Window.
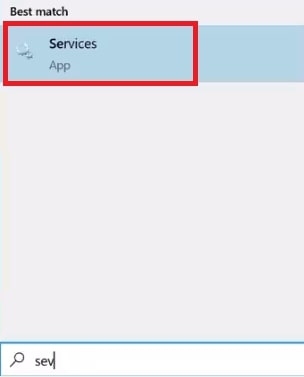
Now, navigate to Taskbar.In its Search box, input the “Services” value and press the Enter Key.
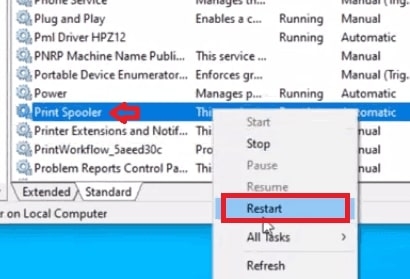
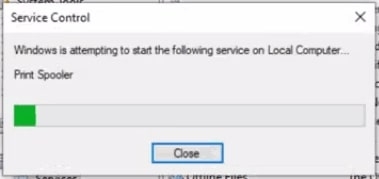
In Services, you will see a long list of Services.Navigate to Print Spooler through its Search feature.Right-Click the “Print Spooler” option.A drop-down menu will appear; navigate to Restart.
Let your Print Spooler service reboot. Afterward, you can exit from the Services window. When reboot the computer, follow the steps below on Client Computer.
Steps to Solve 00x0000011B Error over Client Computer
Client Computer is the one form where you give the Print Command. The Windows cannot connect to the printer Error 0x0000011b issue is experienced over this computer. Follow the steps given below:
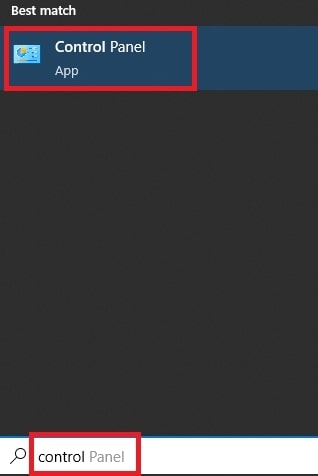
Press the Windows Button.In the Search bar, input Control Panel.Press the Enter key after you see the Search Results.
The Control Panel window opens.Navigate to Programs and Features.
Under Programs and Features, navigate to the View Installed Updates option.
Here, you will see Windows installed updates.Go to the recently installed Windows update.Here click to uninstall the update.
Now, you will see a confirmation option and press the Yes option to proceed.This will uninstall the selected update.
Let the Windows Update be uninstalled.
Now, press the Restart Now option to allow the changes to reflect.
Let your system reboot.Afterward, navigate to Network.Here to will see your Network Printer icon in the thumbnail.Double click so that the printer link will connect with your Network Printer.
Wait till the time Windows Printer Installation completes on your Client’s Computer.
Then a window will appear showing the Print Queue.
Kudos, you have successfully debugged the “Windows Cannot Connect to the Printer Error: Operation failed with error 0x0000011B in-network.”
Which Windows Security Updates lead to Error 0x0000011B?
Could not Connect to the Printer usually occurs over the Client’s Computer using a Network Printer. Windows Security Updates like KB5005565 or KB5006670 lead to the issue. You can follow the guide or uninstall the Windows Security Update to fix the error.
The Final Word
We have shared the full-fledged guide to fixing the Error 0x0000011B over your computer network. If you carefully read and implement the guide, you will eliminate the issue. However, if you have used any other trick to solve the problem, please let us know in the comments section below!

